Scandinavian Rosette Cookies - Achappam with Maida


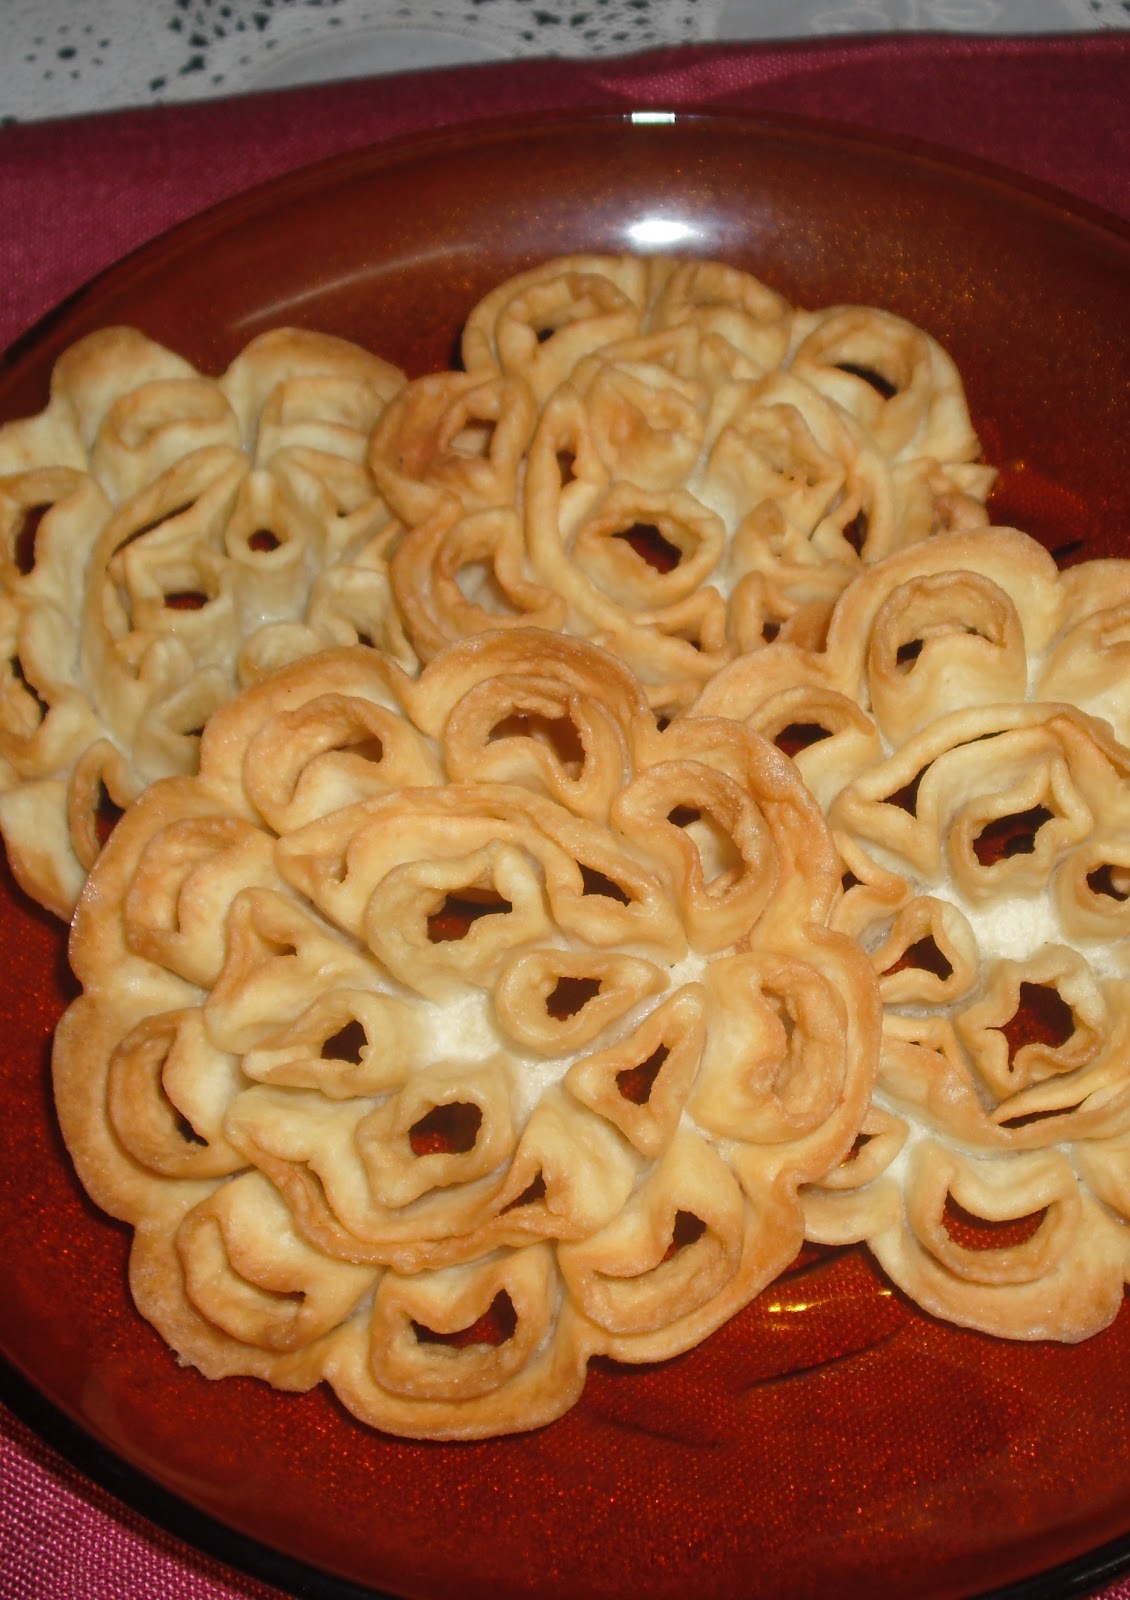
Christmas is just over ..... but my hang over is still on. Out of the various snacks i prepared, i just left out Achappam. I just think it is difficult and i keep on postponing. This time i took the Rosette iron from my mother in law and was searching for the recipe. The proportion should be correct, otherwise, the batter wont leave the iron. That is when i came across the European version which used flour / maida instead of rice flour. Since Achappam requires fresh rice flour you dont have any short cut using store bought roasted rice flour. So the Scandinavian version was just right for the lazy me. I tried it today and the first one was a flop. I think i overheated the iron before dipping it in batter. Rest is what you see in the picture. 

This is just another reason i would like to say never  give up. Even if you follow a recipe strictly, sometimes we should use our intuition and logic to get it right. Not for just recipes, but everything in life - I believe.

You can prepare these rosette cookies if you have a rosette iron. If you  dont have one, use a cookie cutter of any shape (star, flower, heart, rounds, ovals, etc) and hold it with a tweezer.


ingredients for the rosette cookies

flour / maida - 150 gms
egg - 1 large
milk - 150 ml + 25 ml if need be
vanilla essence or rose essence - 3/4 tsp
salt - 1/4 tsp
sugar - 1  tsp
vegetable oil for frying

ingredients for dusting

sugar - 4 tbsp
cinnamon powder - 1/2 tsp

method

Take a narrow bowl. Just wide enough to dip the rosette iron / mould. Place the egg, salt and sugar in it and whisk. Add milk little by little until all milk is used. Add the flour little by little as done for a pancake until the flour is fully used. Add the essence.  I used rose essence. You can  use according to your choice. Place the batter in the refrigerator for 15 minutes.

Heat oil in a deep pan. When hot, place the iron in the oil. Make sure the iron is moist free, otherwise you can see some explosions. When the iron is medium hot, say 1-2 minutes, lift it from oil, shake off excess oil   and place it in the batter, such a way that the batter does not cover the top of the iron. (If it is covered the cookies wouldnt leave the iron while frying). Place the iron covered with batter in the oil and gently shake it continuously. Also, use a broad knife to help the rosette cookie leave the iron. Gently slide it away from the iron. Do the entire process in low to medium heat, otherwise, the cookies will turn dark. Once the rosette is golden brown drain it from oil. Repeat the process. You may not be able to use all the batter to prepare cookies because the batter needs some elevation to coat the iron. Use up the balance batter by spooning it into oil.

For the dusting - Place the sugar and cinnamon in a mixer and powder it. Place the sugar mix in a sieve and dust it generously or as per your taste.


Fish Mappas - Karimeen Mappas


Karimeen Mappas


Mappas is a vinegar infused coconut milk curry prepared with fish or meat as the main ingredient. Meat or fish is first seared to seal the proteins and then it is cooked in the gravy to make it more flavorful and firm.

Duck mappas is the famous among all meat mappas while karimeen mappas is the famous within the fish circle. Mappas can be prepared using any other soft flesh whole fish like pomfret (akoli or maachan) or using fish fillets from sear fish or red snapper. The gravy is a really tasty one even without fish. So you can use your freestyle method to use this recipe with anyother ingredient like paneer, potato or soya chunks - Vegetarians, hope you hear me.

ingredients for the recipe

4 whole pearlspot / karimeen - cleaned and scored
salt - 1/4 tsp
turmeric - 1 large pinch
oil - to sear the fish

for the gravy

3 tbsp coconut oil or vegetable oil
15-20 small onions / shallots, thinly sliced
2 green chilly, slit
2 sprigs curry leaves
turmeric - 1/3 tsp
chilly powder - 2 tsp
pepper powder - 1 tsp
coriander powder - 3/4 - 1 tsp 
2-3 tomatoes - cut into rounds (as seen in picture)
Coconut milk (1st extract) - 3/4 cup (use 3/4th of a large coconut or 1 coconut) - the gravy has to be thick
Coconut milk (2nd extract) - 1 cup
vinegar - 3 tbsp
salt to taste
Karimeen Mappas | Fish in Spicy Coconut Milk Curry


ingredients for the recipe

4 whole pearlspot / karimeen - cleaned and scored
salt - 1/4 tsp
turmeric - 1 large pinch
oil - to sear the fish

for the gravy

3 tbsp coconut oil or vegetable oil
15-20 small onions / shallots, thinly sliced
2 green chilly, slit
2 sprigs curry leaves
turmeric - 1/3 tsp
chilly powder - 2 tsp
pepper powder - 1 tsp
coriander powder - 3/4 - 1 tsp 
2-3 tomatoes - cut into rounds (as seen in picture)
Coconut milk (1st extract) - 3/4 cup (use 3/4th of a large coconut or 1 coconut) - the gravy has to be thick
Coconut milk (2nd extract) - 1 cup
vinegar - 3 tbsp
salt to taste

method to prepare fish mappas

Step 1 - Sear the fish

Mix the salt and turmeric and rub it on the fish. Keep it aside for 5 minutes. Heat oil in a pan and place one fish at a time. The pan and oil should be very hot (take care while placing the fish). Sear it for one minute on one side and try to lift the fish using a spatula. Dont force the fish to come out. Since it is on high heat, the fish will leave the pan once it is seared. Turn the fish and sear the other side also and remove from pan. Repeat the same process with the remaining fish.

Step 2 - Preparing the fish mappas

Heat 3 tbsp oil in an earthern pot. Add the shallots and green chillies and stir till translucent. Add curry leaves, turmeric, chilly and coriander powder. Stir in low flame till the raw smell is gone and the spice powder sizzle. Add the tomatoes and gently stir till soft. Try to retain the round shape so that you can use it to garnish the mappas.

Prepare this recipe in low to medium flame. Slow cooking bring out the flavours of all the ingredients and it also results in a thick gravy.

When the tomatoes are soft add vinegar and salt. Give a gentle stir and cook till vinegar is fully incorporated into the masala. This also prevents the coconut milk from curdling. Add the second extract of coconut milk and bring it to a boil. At this stage you can add the pepper powder. Simmer it for 5 minutes.

Add the seared fish and cook till done. Check salt and taste. Turn to low heat and add the first extract of coconut milk. Lift the pan by holding it on two sides and gently shake it, so that you dont distrub the fish. It is after all basking in mappas glory. Do not let the curry boil after adding the first extract of coconut milk. Lift and gently swirly the pan again so that coconut milk is evenly distributed. Turn off heat and cover it with a lid. Serve after half an hour.

This is a mildly spiced curry. If you are preparing a meat mappas, say duck mappas, beef mappas, chicken mappas or a mutton mappas just avoid using tomatoes, instead, add 3 more tbsps of vinegar and 2 large onions more.

The picture you see in the background is Meat Chops

Phirni - a rice dessert

hi everybody,

I prepared Phirni and was determined to post it today itself. As always, the photo session was a very hurry one. I thought i could convert the video into photo.  I couldn't. So you may have to click on it to view.

Phirni is a thickened rice dessert with a nutty flavour from the almonds and pistachios.


the recipe

Milk - 300 ml
Rice flour (Idiyappam flour) - 3 tsp or 3tbsp raw rice soaked & ground to paste
Sugar - 3 heaped tbsp + extra if u need
Rose essence - 2 drops or Rose water - 1 tsp
Cardamom - 3
Pistachios and Almonds - 15 each slivered
Rose petals - optional
Water - 3 - 5 tbsp

the method

Make a paste by mixing the rice flour and water. Heat milk in low flame and add the rice paste and mix well. Stir continuously in low flame till the rice flour is fully incorporated with milk. Taste it. When milk turns to a thickened consistency, like a condensed milk, add sugar, cardamom powder and rose essence. Continue stirring. Taste it. If you need more sugar add it. Add 3/4th of the slivered nuts and stir and taste it to check whether the rice flour is fully cooked. Turn off heat. Continue stirring to prevent the formation of lumps. When warm, spoon the phirni into pudding / dessert bowls. Cover and chill for 1 to 2 hours. Take it out of the refrigerator and garnish with remaining nuts and rose petals.

This is a very simple recipe. Make sure you keep all the ingredients and serving bowls ready before you start the preparation.

I'll try to upload a photo soon (instead of this video).

cheers

roshan

Wattalappam - Srilankan Coconut Cream Custard


Wattalappam is a Srilankan dessert prepared using coconut milk & jaggery which is a regional take on the basic milk-egg custard. The sugar that gives sweetness to the traditional custard is replaced by jaggery / palm sugar that gives a nice concoction like flavor. Wattalappam is spiced with nutmeg instead of the usual vanilla.  

I have been reading  Wattalappam recipes from various sources for quite a number of years but the number of eggs made me dizzy.  All the recipes I  have come across for the pass 4 or 5 years have had 10 eggs. I came to know about Wattalappam from a television program in which also, the person adds 10 eggs.  

I knew i had to find an alternative by adding some thickening agent. Then I decided to reduce the liquid content so that I would require only lesser number of eggs. Finally I reworked everything and came up with this recipe which has just two eggs.


You can serve 8 -10 people moderately or just 8 scrumptiously or just four generously…

I prepared one bowl  full (in picture) plus 4 ramekin sized cups. Serve Wattalappam with fruits or nuts to make it more filling. We had it plain.


The old recipes I read had only nutmeg as a spice. Recently I saw the addition of more different types of spices like, cardamom, cinnamon or a combination. I guess nutmeg is traditional ingredient and so i have added only nutmeg. The custard is very good, wobbly, velvety and had a melt in the mouth consistency.


the recipe

eggs - 2
jaggery - 200 gms
cream - 100 mil
hot milk - 100 ml
coconut - half of a medium sized one
nutmeg - 1/3 of  a whole nut

I coated the bowl with jaggery so that it is easy to get it out once it is chilled and it is more sweet with that extra syrup.

Step: 1 - Extract the coconut milk - Grate the coconut or cut the coconut into chunks and put it in a mixer jar and run it for few seconds. Pour the hot milk. Grind the coconut till soft. Pour it through a sieve and extract coconut milk. Keep it aside. (do not add more water)

Step: 2 - Melt the jaggery with 1 tbsp water and strain it to get rid of any impurities.

Step: 3 - Pour the coconut milk into the melted jaggery and mix quickly. If it tends to form lumps, heat it in low flame till the jaggery melts.

Step: 4 - Lightly beat the eggs in a bowl.

Step:5 - Pour a 2 tablespoons of the coconut-jaggery mix into the eggs to temper the eggs. Tempering means stabilizing the temperature otherwise the eggs will curdle. Once it is mixed pour the egg mix into the coconut-jaggery mix and stir well.

Step: 6 - Grate the nutmeg into the custard.

Step: 7 - Strain the whole mix.

Pour into a bowl coated with jaggery and steam it for 20 - 25 minutes. Make sure half of the bowl is immersed in water.

 Let it cool at room temperature. Chill it in the refrigerator for an hour or more and serve. Steaming time differs with quantity.

This pudding can also be baked by placing it in a water bath ( by placing the wattalappam bowl on another bowl half filled with hot water).

enjoy!


A compilation of James Bond Title / Theme music & other JB musings


I know this is a food blog… but I wanted to put some thoughts over here today….which is a spur of moment thought…but it did take some time to find out the original  youtube links without advertisements.

I searched for the hashtag #JamesBond  on Twitter today for an official purpose and saw the theme song for Skyfall by Adele ( in Mashable) that was trending (http://mashable.com/2012/10/04/adele-skyfall-james-bond-theme-video/). 

I listened to it and I just couldn’t stop listening to it and also went to Adele’s website (http://home.adele.tv/).  The reason may be because the lyrics were readable and something like a singalong.


It is the 50th Anniversary of James Bond movies today and I am a fan of many JB guys especially Pierce Brosnan, in JB as well as other movies like Mamma Mia. I have wondered what the zodiac of these guys are. A short research result concluded not the same.Anyways if you would like to hear the title / theme of other James Bond movies from 1962 onwards a compilation is here.


Another way to Die – Quantum of Solace 

You Know My Name   -   Casino Royale

Die Another Day – Die Another Day

The World Is Not Enough - The World Is Not Enough

Tomorrow Never Dies - Tomorrow Never Dies

GoldenEye – GoldenEye

Licence to Kill - Licence to Kill

The Living Daylights

A View To a Kill - A View To a Kill

All Time High


For Your Eyes Only

Moonraker

The Spy Who Loved Me

The Man with the Golden Gun

Live and Let Die 

Diamonds Are Forever

On Her Majesty's Secret Service

You Only Live Twice

Thunderball

Goldfinger

From Russia With Love

Dr.No


Just another crazy day …..

cheers

Clam Fry - Kakka Irachi Varuthathu


The backwaters of Kochi are a rich source of tasty fish, prawns and clams. Some of these tasty creatures  are specific to the backwaters of Kochi that extends to Alleppey, Kollam and Kumarakom. To name a few are pearlspot (Karimeen), mullet (Kanambu and Thirutha), mud crabs, prawns and these tasty clams.

All these are also a part of the 'Gods own country' tag. Uunfortunately these are facing a hard time because of the unscrupulous or rather unthoughtful developments that are clogged around Kochi. It seems some tourists choose Kochi or Alleppey just to eat the Karimeen which is turned into a mild fish moilee to suit their palette.

A major part of the backwaters was sold for real estate development when the Goshree Bridge was commissioned. The filling of backwaters continues without giving a thought on the environmental disasters that can ensue. 

The latest development strategy is Emerging Kerala. I did not really delve into the details, but just know that days after the announcement we are also going through hours of loadshedding (no power supply). The sun is shining quite well these days. So I think it is a coincidental indication that we should switch to Solar Power and save the earth ourselves.

Sorry for getting intp the contemporary news......coming back to the clams....these are collected by professional clam collectors by diving into the backwaters. They boil it and the shells are removed before it reaches the commercial place - the markets and individual sellers. 

Eating clams from hotels may not be a very good idea because it requires good cleaning. You can see a black portion of it in the fresh ones which is dirt. You should pinch it off or use a fish scissor to cut it off.

Recipe for Clam Fry (sometimes clams are mistaken for mussels)

Fresh Clams – 300 gms approx (if you are using canned clams use just 225 – 250 gms)

Ingredients to boil the clams
Ginger – ½ inch piece sliced into juliennes
Turmeric – ½ tsp
Green chilly – 2 nos
Curry leaves – 2 sprigs
Garlic – 4 cloves (optional)
Salt to taste

Ingredients to fry (this is not a deep fry)

Oil – 3-4 tbsp  (coconut or vegetable oil)
Onion – 2, julienned
Garlic – 6 cloves, chopped
Curry leaves, again – 1 or 2 sprigs (you can remove the curry leaves from the boiled clams)

powders
Turmeric powder – ¼ tsp
Chilly powder – ½ , ¾ or 1 tsp depending on your taste
Pepper powder – ½ tsp

Salt to taste

The method

Clean the clams first by washing it in hot water twice and then by removing the dark / dirt as mentioned in the last paragraph above. Once done, rinse in cold water twice to get rid of any dirt sticking to the clams.

Place it in a heavy bottom pan or clay pot with water covering just half of the clams. Add all the ingredients to boil, and cook in medium heat for about 15 minutes or until it turns soft. There should be only about 2-3 tbsp water once the clams are cooked.

Heat oil in a wide, heavy bottom pan or cast iron skillet and add the onion and garlic. Stir it till it is translucent. Add the curry leaves and powders and stir for few seconds. Add the boiled clams and turn to high heat. Keep stir till the water evaporates from the clams. When water is almost fully evaporated from the clams cover the pan with a lid. The clams will give a bursting sound inside and turn firm. This is the consistency. Turn to low flame and carefully open the lid and stir so that all the clams get high heat and explode. Continue this till all clams turn hard as you see in the picture. Serve with rice. You won’t need anything else to have this.

Stay updated by clicking the LIKE button or by subscribing freely to this blog!

Mail me to roshanscucina@gmail.com to clarify any doubts before trying a recipe..

<><><><><><><><><><><><><><><><><><><><><><><><><><><><><><><>

Simple Flavourful Semiya Payasam (without condensed milk)


All the luxuries in life need not be reaally luxurious. I just wanted to say that you can enjoy gourmet food without the oomph ingredient which in this recipe is the condensed milk. 

We were not at home this Onam and i just couldn't manage myself without preparing a payasam, though i had few varieties of payasam during the Onam celebrations at my office. Coming to condensed milk, it is not an ingredient which i usually store. Because it cannot be stored for more than a day especially if the can  has been opened once. There is one thing you need to be careful with the tin. In our violent urge to lick the last bit of condensed milk left in the tin it is usual that we try to wipe it with our finger. But if the rim / seal of the tin extents out even a little bit, it is very likely that we get injured. Well, i have got injured that way and got a deep wound in my pointing finger. 

This was a quickfix Vermicelli payasam which i prepared after returning from office (bcoz) i couldnt wait till the next weekend. The sun was setting and i tried to get the last bit of sunlight and there you can see the shadow of our window in the photograph.

The recipe is simple. Preparation & Cooking time - 20 minutes. Serves four sumptuously.

ingredients

Use the same cup to measure the ingredients - the right proportion yields best results

Vermicelli / Semiya - 1 cup
Sugar - 1 cup
Milk - 3 cup (2 1/2 + 1/2)
Water - 1/3 cup
Cashewnutes - a handful
Raisins - 3-4 tbsp
Cardamom - 6-8 medium sized, peeled
Ghee - 1 1/2 tbsp


the method

Heat a sauce pan in medium heat and add ghee. Fry the cashewnuts and raisins and keep it aside. To the remaining ghee add the vermicelli and stir till the vermicelli starts to turn golden brown.

Add water and half cup milk and let the semiya cook (about 7 minutes). Stir continuously to avoid the mixture from forming a layer on top. Cook in medium heat continuously.

Semiya / Vermicelli is a kind of pasta. The normal cooking time for all types of pasta is 9 minutes. Vermicelli is stirred in ghee to make it non stick and to prevent it from turning mushy.

When the vermicelli has been cooking for seven minutes add the remaining milk. Continue stirring. You can keep your eye off to grab other ingredient. That much time the payasam can hold without you :-)

I like to powder the cardamom with sugar bcoz i dont store cardamom in powder form. Put the sugar and cardamom in a mixie jar. I mentioned flavorful in the name for a reason. When you powder the sugar and cardamom you can add few fried nuts also to bring in that added flavour. Put it in the mixie for, say, 5 - 8 seconds. Add the sugar to the semiya mixture. Stir well and let it boil for 1 or 2 minutes. Add the friend cashew nuts and raisins. Serve at room temperature.

The Semiya Payasam has a not so thick not so runny consistency.

Belated Onam Wishes!

Butterscotch Apple & Walnut Cookies


Butterscotch Cookies are simply gorgeous. I think it looks and tastes awesome. So a mention to its looks is unavoidable. This is the second time i am trying a butterscotch cookies and so there is a shot of apple and walnuts to take it another level of taste.

Preparing the butterscotch is slightly tricky when you try it for the first time. When you add the butterscotch into the cookie mix it is likely that it solidifies. So in each trial i come out with some solution so the butterscotch gets incorporated into the dough without turning hard.


the recipe

Plain flour (Maida) - 150 gms
Wheat flour - 150 gms
Sugar - 100 gms
Brown Sugar - 75 gms
Butter - 100 gms (50 + 50) @room temperature
Walnuts - 100 gms
Apple -2 medium sized
Vanilla extract - 1 tsp
Baking powder - 1/2 tsp
Baking soda - 1/2 
Salt - 1 generous pinch (omit salt if you are using salted butter)
Milk - 3-4 tbsp
Egg -1
Water - 3-4 tbsp

Method

Measure both the sugar and powder it. Divide it into two portion. One portion is to be used up for the butterscotch. Place the other half in a bowl. Mix the flour, baking powder, salt and baking soda. Sieve it once and mix with sugar. Keep it aside. This forms the dry ingredients.

Deseed the apple and blend it to form a puree. I dint peel the apple. It is left to you how you puree them. No probs whatever the method. You may have to use 3-4 tbsp milk while blending.

Place 50 gm of butter and soften it with a folk. Add the egg and just beat it till mixed. Pour the apple puree into it.  Place all the dry ingredients into the bowl and mix till the ingredients turn into a cake like batter. Well, this is a cookie but we are not talking dough, instead it is a thick batter. Once this is done, cover the bowl and keep it aside or keep it in a refrigerator.

Method to prepare the butterscotch....this is tricky

If you browse through the web you can see many recipes for butterscotch, prominent ingredients being butter, brown sugar, vanilla and cream. I am going to share with you my own recipe...which has not let me down thus far, when i have used this in cookies as well as puddings.

Place half of the powdered sugar mix in a heavy bottom saucepan, in medium heat.When the sugar is almost melted add 50 gm butter and keep stirring till the butter is fully incorporated. Turn to low heat and add water. The butterscotch will loosen up. Turn off heat and keep stirring continuously. When it has reached pour tablespoons of butterscotch over the cookie batter and immediately mix the batter. Continue till the butterscotch is fully used up.Roast the walnuts and stir into the cookie mix. Place the batter in the refrigerator for one hour.

Preheat oven at 180 C.

Prepare a baking tray by applying butter and flour or just place a baking sheet. Spoon one tablespoon batter by leaving one inch space between cookies. Bake the cookies for 12 minutes.

Oven temperatures differ. Bake till the edge of the cookies start to brown.

The recipe goes to Bake Fest


Uppum Mulaku (Salt & Chilly) ....an instant pickle from Kerala


The uppum mulaku is like a traditional dish of Kerala. ‘Uppu’ means salt and ‘Mulaku’ means chilly (either green, red or some red chilly powder).

Please don’t laugh at it because it brings a smile to anybody when you say there is an uppum mulaku in the platter. It is unconventional and so it is traditional too.

Uppum Mulaku is usually prepared when there is no spicy curry or just as an accompaniment for rice gruel or porridge. There is an English word for rice gruel which is Congee. I came to know about this only recently. In Malayalam, rice gruel is called kanji and in Tamil it is kanchi.

I do not know the evolution of this uppum mulaku recipe, however I am gonna write some of my assumptions. It is like a research J

(i) The first recipe should have been just some salt in a side dish (plate or bowl) with a fresh green chilly with stem to be had with rice porridge. There is a method to eat it. You should take a spoon of the congee and bite the tip of the green chilly. The bitten greenchilly is then dipped into the salt before taking another spoon of congee. I have had this combination just to experiment. This is an explosive, you should try it. I am not a fan of green chilly so it remains a one time testing.

(ii) The second type of uppum mulaku I have known is a crushed combination of salt, green chilly and shallots and sometimes with few drops of coconut oil. This probably is an evolved one to give the recipe a oniony zing and a slight creaminess.

(iii) The third type of uppum mulaku is what I have had at home. This is a combination of salt,crushed shallots, chilly powder, few drops of vinegar and few drops of coconut oil.


(iv) The fourth and final recipe is a slightly advanced version, the one which you see in the picture. The recipe is as follows:

ingredients

Shallots – 15
Chilly powder – 1 tsp
Salt – to taste
Seedless Tamarind – 1 tbsp
Coconut oil – ¾ to 1 tsp
Vinegar – 1 tsp

the method

Roughly chop the shallots and place it in a mortar. Add salt and chilly powder and crush it. Place the tamarind in the mortar and crush it to blend with onion mix. Check salt, pour the coconut oil and vinegar and give a quick mix. Serve it immediately with rice, kanji or boiled tubers like tapioca (Kappa) or greater yam (Kaachil).

This is a Kerala based pestel or an instant pickle and if by any chance you have leftovers you can keep it in the fridge, though it is not known to have been stored for a longer period. Using it fresh, the better. 

If you do not have a mortar, put all the ingredients in the smallest mixer jar and crush it for just 2 seconds.

the recipe goes to EP series Curry leaves or Dried red chillies event started by Julie

Kuccha Baingan Ka Bartha with a Mustardy twist


This is Kuccha baingan ka bartha. Kuccha means raw but in this recipe, the main ingredient which is eggplant/brinjal is roasted and then mixed with raw ingredients. The mustardy twist was a last minute idea for this recipe to taste our kind of recipes....because too much of experimentation is a big no here.

The idea for this recipe is from Nisha's Kitchen and the recipe is for this month's blog hop.

ingredients

4 plump eggplants - around 400 gms

ingredients for the seasons

1 tomato, chopped
1 sprig coriander leaf, chopped
1 tsp store bought mustard
salt too taste - add salt only after adding mustard and tasting it. salt is not required if the mustard is on the salty side.

I have not added any kind of chilly or pepper. The original recipe has 1 finely chopped green chilly, onion and lemon juice. Since the mustard has some kind of wine or vinegar in it, i did not add lime juice. The onions, i just skipped it.

method

Poke a skewer into the brinjal and roast it over direct heat from your stove by holding the skewer above the flames. I did this for about 5 minutes and felt this would take time. So i took the eggplants off the skewer and placed in the oven for 10 minutes in the Grill + Microwave option. The eggplant came very well cooked and it was easy to peel. So the next step obviously is, take the eggplant out of the oven and let it cool. Peel the eggplant.

Cut the eggplant and remove the hard part from the stem. Take out the pulp, chop it or mash it and place it in a bowl. If there is too much seeds, discard some of them. Add the chopped tomato, coriander leaves and mustard and give a quick mix. Check salt.

The interesting part of this recipe is its applicability. You can have it with chappati / roti or serve it chilled with some tacos or use as a topping for a bruschetta or just hid it in a salad. It is really tasty. 

The goes to Blog Hop hosted by Radhika


Spicy Brinjal and Potato Stir Fry

Brinjal is one of my favourite vegetables. Growing up in the hillstation Valparai we had our own patch of vegetable garden and we use...