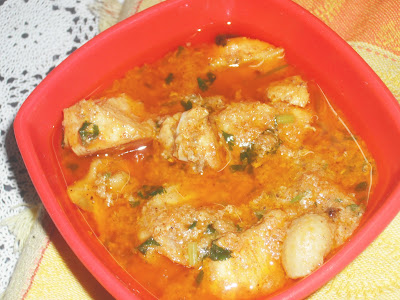
Chilly Tomato (Chinese)


Just before posting this recipe, I googled to check whether there is any similar dish already. After the googling I just felt I should a clue to the title. Because there are many other chilly and tomato combinations that is not Chinese.

Chilli tomato is like a chilly gobi or a chilly chicken which is very suitable for a side dish. The inspiration to prepare this recipe is from the fast food joints in Kochi that serve chilly tomato with parotta….. We had this with chapathi.

the recipe

Tomato – 3
Capsicum – 1
Green chilly – ½ or 1 small
Onion – 1 big
Chilly powder – ½ tsp

Pepper powder – 1/8 tsp
Soya sauce – 1 ½ tbsp
Tomato sauce – 1 tsp
Salt to taste
Sugar – 2 pinch
Oil – 2 tbsp

Garlic – 4 cloves

Method

Cut the tomato into half. Scoop out the seed and flesh in the inside and keep it in a bowl..
Cut the tomato into cubes and place it in another bowl.


Cut the onion, capsicum and chilly into juliennes. Chop the garlic.

Heat oil in a pan and the garlic, followed by onion and green chillies. Saute for about a minute and add the capsicum and the scooped out tomatoes. Saute for a minute. Add salt and chilly powder. Add the cubed tomato. Turn to high heat and sauté till the tomatoes are just cooked. Pour the soya sauce and sauté briskly. Add sugar immediately. Stir for about 5 seconds and add the tomato sauce. Add the pepper powder. Turn off heat. Serve hot with fried rice, noodles or chapathi.

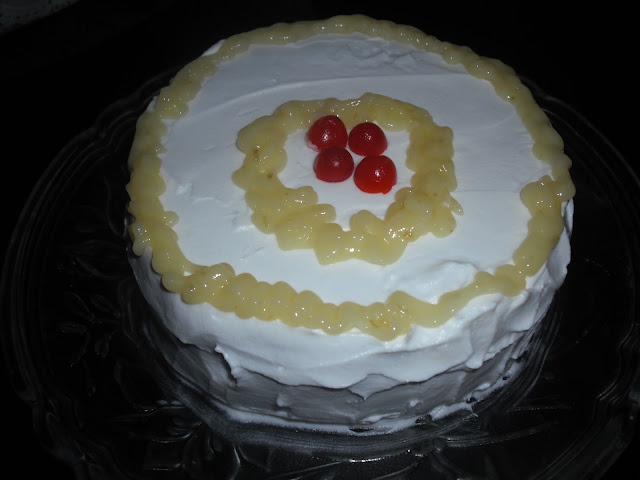

Lemon Cake with Lemon Curd and Cream


The combination of lemon cake with lemon curd and cream is something to die for!

The idea of preparing a lemon cake is adapted from Food buzz while the lemon curd has been on my to do list for a long time and the cream is of course to give a balance to the extremely citrussy flavor in the cake and the L.Curd.

I got slightly lazy and impatient on the course of preparing this and it has reflected in the way the cream and the icing looks. And of course I have learnt a lot of lessons that should be taken care of while preparing lemon curd and storing it.

For the lemon curd I followed the recipe from Joy of Baking. I did not follow the recipe thoroughly and so I got to learn that the lemon curd has to be strained as soon as it is taken off heat . This is to get rid of any lumps, as well as to strain the zest of lemon which otherwise will increase the sourness of the lemon curd and gives a slight bitter taste as it sits, and it is also easy to pipe the lemon curd when there is no zest in it which is likely to get stuck in the nozzle…….Here is my slightly bad looking yet very tasty lemony cake.


Ingredients for the lemon cake

Flour – 2 cup (200 gms)
Eggs – 2
Baking powder – ½ tsp
Caster sugar – 2 cup
Vegetable oil – 1 cup
Vanilla Extract – ¾ tsp
Juice of 1 ½  lemon
Zest of one lemon

Method to prepare the cake

Preheat the oven at 180 C. Prepare a pan: butter the pan and dust it with flour. Tap out excess flour.

Sift together the flour and baking powder thrice. In a mixing bowl, place beat the eggs one at a time. Add the caster sugar in 3 to 4 steps at speed 1 and then beat the mix at high speed for about 4 minutes till it doubles in volume. Add the vanilla extract and mix well. Pour the oil little by little while still mixing.

Stir in the flour 2 tablespoons at a time and mix it with a wooden spatula. When half of the flour is used up add the flour, followed by a teaspoon of lemon juice. Repeat the process till the flour and lemon juice is over. Stir in the zest of lemon. Pour the batter into the prepared pan and bake at 180C for 25 – 30 minutes or till a toothpick/ skewer comes out clean.

Let the cake cool completely.

Ingredients for Lemon Curd

Egg – 1
Juice of one lemon
Zest of one lemon
Caster sugar – 50 gms
Butter – 1 tbsp

Place the egg in a pan and lightly beat it with a fork. Pour the lemon juice and add sugar. Mix well.

Prepare a double boiler (A pan with ½ to ¾ boiling water – once the water has started boiling turn to low heat).

Place the pan with the egg mix in the double boiler and mix well. When the egg mix begins to form the consistency of custard, add the zest of a lemon. Continue stirring till the mix gains a thick consistency (about 6-9 minutes). Strain it immediately and add the butter and mix well till the butter is melted. Let it cool completely. Place a cling film or plastic wrap on top of the lemon curd to prevent the formation of a thick layer. Place it in the refrigerator till use.

Other Ingredients

Whipped Cream – 1 cup
Few Cherries

Assembling the cake

Cut the cake into two. Spread the lemon curd, followed by cream. Place the other piece of cake and smother it with lemon curd as seen in the second picture. Spread the whipping cream in the cake evenly. Place few about 3-4 tablespoons of lemon curd in the icing tube (use a nozzle of your choice) and pipe out a preferred design. Place few cherries on top for a color contrast. Serve immediate or chill it and serve. I like the chilled one. Enjoy!!


the recipe goes to Sinful Delights by Vardhini

Crab Roast


Kochi is known for its backwaters, sea, the vivid forms of fishing and the wide variety of fish. Crabs taste  exotic even if it is simply boiled with a dash of salt. Crab Roast is an utterly spicy recipe that goes well with rice.  The one character you should have while eating crab is patience :- )

the ingredients

Crab - 500 gms
Ginger - 4 cm piece
Garlic - 10 cloves
Curry leaf - 1 sprig
Green Chilly - 1 small
Small onion - 10 to 15
Turmeric - 3/4 tsp
Chilly powder - 3/4 tsp
Pepper powder - 3/4 tsp
Cocum - 1 piece
Oil - 2 tbsp
Water - 3/4 cup
Salt - 1 to 1 1/4 tsp or to taste

the method

Clean the crab and cut it into four pieces. Break the legs of the crab to let the spice in.

Heat oil in a pan (preferably an earthern pot) and add the chopped small onions. When lightly brown add chopped ginger, garlic, green chillies and curry leaves. Stir it until light brown and then add turmeric, chilly powder and pepper. Stir well till the raw smell is gone. Add the crab pieces and salt. Stir for a minute and  add water and let it boil. Add 1 tsp salt and cocum. Simmer for about 15 - 20 minutes stirring occasionally. Adjust salt. Serve with rice.

Methi Palak Paneer


While watching the Discovery Travel & Living channel, I got to know that Palak Paneer is a royal dish. I was wondering how some green leaves paste would be called so. The explaination however went on to about the combination of cottage cheese and cream in a mildly spiced palak puree. I then realized that it is indeed royal. To be specific Palak Paneer is a Mughalai cuisine. As usual, I wanted give a twist to it by adding some Kasuri Methi or dried fenugreek leaves and I found that the recipe already exists and therefore the Methi Palak Paneer.

the recipe

Palak / Spinach leaves – 1 bunch (30 – 40 leaves)
Cottage Cheese / Paneer – 200 gms
Kasuri Methi / Dried Fenugreek leaves – 1 1/4 tsp
Tomato – 1 or 2
Onion – 1 big
Ginger paste – 1 tbsp
Garlic paste – 1 tbsp
Oil – 2 tbsp
Cream or milk – ¼ cup
Chilly powder – 1 tsp
Pepper powder – ¼ - ½ tsp
Garam Masala – 1 tsp
Green chilly – 1
Salt - to taste

the method

Blanch the palak leaves – Boil adequate salted water to immerse the leaves. Place the leaves in the water until it is wilted (about 2 minutes). Drain the water. Take out the leaves, cut in into 2 or 3 pieces and grind it to a fine paste.

Soak the kasuri methi for 2-3 minutes. Wash twice and keep it aside.

Cut the paneer into small cubes. Heat oil in a pan and lightly fry the paneer in low -medium heat. Drain the paneer and place it in the milk or water. This prevents the paneer from turning rubbery. To the remaining oil, add the onion and sauté till translucent. Add the green chilly, ginger and garlic paste. Saute  for a minute and add the chilly, garam masala and pepper powder. Add ¼ tsp pepper powder and if need be add the remaining ¼ tsp at the end, while checking for seasoning. Stir in the chopped tomatoes and sauté till it turns soft. Add salt. Pour the palak paste, kasuri methi and ¼ cup water and bring it to a boil. Stir in the fried paneer pieces. Turn to low heat and add the milk or cream. Check seasoning and simmer for 5 – 7 minutes. Tastes good with any kind of roti or naan and also with rice and dal.


Aloo, Palak & Garlic Batura


Off late I have been preparing fatty preparations like butter chicken and this deep fried batura. Batura is usually prepared with maida and potatoes. Since it is still very cold in Kerala, I added palak to induce some heat into the body.  I have heard that palak is widely used in parathas during winter season. The garlic is to season the batura and the two veggies that has gone into the making. Further, this is a wheat + maida batura instead of a maida only one. You can also prepare this using wheat alone though you may have to compromise on the color with no compromise to the taste.

the recipe

maida / flour – ¾ cup
wheat – ¼ cup
salt to taste
palak (spinach), finely chopped – 20 leaves
potato – 1 big (boiled & mashed)
garlic – 8 small cloves or 6 medium cloves (this gives moderate garlic taste)
baking soda- ¼ tsp
water – a little less than ½ cup
oil to deep fry

the method

Place the maida, wheat flour and baking soda in a bowl and mix well.  Stir in the chopped palak, mashed potato and finely chopped garlic. Crumble all the ingredients together with your fingers. Sprinkle salted water little by little until the flour mix is kneaded into dough. Divide it into 8 balls and roll into into slightly thick baturas and deep fry it. Serve it with a curry of your choice.


Soya Cutlets ( baked or fried )


Until recently, I have been preparing only soya chunk curries. Once I tried to prepare recipes with soya mince, it seems to be very interesting. Therefore, the soya mince curry came up and then I tried to prepare cutlets using soya mince. On the first bite it is very difficult to distinguish whether this is a meat cutlet. However on the second bite you will definitely know that this is soya, because you can taste its flavor.

About Soya Mince, you can either prepare it at home or just use store bought ones. In the soya mince curry I had used a different method to prepare the mince and for this cutlet I followed a different method. The latter is a better process.

I prepared a baked cutlet to reduce the oil intake as well as to save time. You can just bake everything in one go.

the recipe

soya chunks – 20 -25 nos
potato – 2 medium or 3

the quantity of potatoes must be equal to or more than the soya mince bcoz soya has a very strong flavor

onion, finely chopped – 1
garlic, finely chopped – 2 cloves
ginger,  finely chopped – ¼ inch piece
garam masala – ½ tsp
coriander leaves, chopped – 2 – 3 table spoon
lime juice – 1 tsp
turmeric powder – 1/8 tsp
chilly powder – ½ tsp
pepper powder – ¼ tsp
salt to taste
oil – 1 tbsp

to coat the cutlets

milk – ¼ cup
pepper powder – a pinch
bread crumbs – from two slices

the method

Boil adequate water to immerse the soya chunks. Turn off heat. Add ½ tsp salt into the water and stir in the soya chunks. Cover and let it soak for 20 minutes. Drain off and squeeze water from soya chunks. Wash it with fresh water. Cut it into two. Place the chunks in a blender and blend for 2 seconds. It would have become strands. Keep it aside.

Boil, peel and mash the potatoes.

Heat oil in a pan and sauté the onions. When translucent add the chopped ginger & garlic (ginger garlic paste is also okay). Add turmeric, chilly, garam masala and pepper powder.  Stir in the soya mince and salt. Sauté until it is coated well with the spices (add few drops of water if need be). Add the lime juice and coriander leaves. Turn off heat. Let it cool.

Add the mashed potatoes to the sautéed mince. Knead it to a dough. Keep it aside for 10 minutes. Shape it into patties of desired shapes.

Take the milk in a slightly wide bowl and add the pepper powder.

Keep the bread crumbs in a flat plate.

Take each cutlet, immerse it in the milk mix and then put it in the bread crumbs and coat it well.

Preheat over at 200 C for 5 minutes. Bake the prepared cutlets at 200 C for ten minutes. Serve with tomato ketchup or as you please.

* this cutlet can be either baked or fried

Butter Chicken


Butter Chicken is a mild and slightly creamy chicken preparation that can be had with any kind of Indian flat bread like chapati, naan or batura. The addition of butter may not sound healthy, but i feel it is okay to have a little bit of sinful indulgence once in a while.


the recipe

ingredients for the marinade

Chicken - 500 gms
Lemon juice (optional) - 1 tbsp
Salt - 3/4 tsp
Ginger Garlic  paste - 1 tbsp
Garam Masala- 1/2 tsp
Pepper powder - 1/2 tsp

other ingredients

Butter - 1 + 1 + 1 tbsp
Onion - 1 (ground to paste)
Tomato puree - from 2 tomatoes
Kashmiri Chilie powder - 2 tsp
Turmeric powder - 1/2 tsp
Coriander powder - 1/4 tsp
Cumin powder - 1/4 - 1/2 tsp
Garam Masala - 1/4 - 1/2 tsp
Coriander leaves & stem, chopped - 1/4 cup
Cream - 1/4 cup
salt to taste


the method

Cut the chicken into small pieces. Marinate it with the ingredients for the marinade for 30 minutes.

Heat one tbsp butter in a heavy bottom pan / pressure cooked in low heat. Add the marinated chicken and saute for about ten minutes.

In another pan add one tbsp butter and pour the onion paste. Add some salt so that the water from the onion will evaporate quickly. Saute for a minute or until the raw smell has gone. Pour the tomato puree and add turmeric, coriander, chilly and cumin powder. Let it boil for a while. Add the sauted chicken and mix well. Bring it to a boil. When the chicken is almost done add the garam masala. Reduce to low heat and add the lightly beaten cream. Stir briskly so that the cream will completely blend with the gravy and will not curdle. Check salt and stir in the coriander leaves. As per butter chicken recipes a final dollop of butter is essential. I have also added the same but it melted and came on top of the curry as you can see in the picture. So it is thoroughly optional whether to add another tablespoon of butter before turning off heat. This is a very tasty preaparation. Enjoy as you please.

the same recipe can be followed to prepare Butter Paneer or even a Butter Potato ;-)


Guest Post at Nithu's Kitchen

hi everybody,

glad to inform you that i got a chance to guest post one of my recipe and have a small chat at Nithu's Kitchen which has some yummy recipes.....

i guest (re-)posted Kashmiri Paneer recipe ...please do check out Nithu's Kitchen.....

cheers

roshan

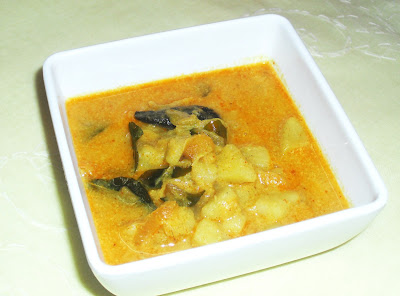
Chembu Curry (Colocasia / Taro)


It is interesting to note how recipes evolve in our kitchen. This chembu / colocasia recipe evolved as a result of a dialogue in a Malayalam movie where the protagonist asks his caretaker to prepare a fish-like chembu curry with cocum / camboge in it. 

in case you do not have cocum, it can be substituted with tamarind pulp.

the recipe

Colocasia / chembu - 300 gms
Turmeric - 1/4 tsp + 1/2 tsp
Green chilly - 1 or 2
Salt to taste

Coconut Oil / veg oil - 1 1/2 tsp
Small onion - 5
Curry leaves - 2 sprig
Chilly powder - 1 1/2 - 2 tsp
Coconut milk (second extract - thin) - 1 cup
Coconut milk (first extract - thick) - 3 /4 cup
Cocum - 2 medium size pieces
Ginger - 1 1/2 inch piece

the method


Peel and cut the colocasia / taro into small cubes. Wash thoroughly. Cook it in second extract / thin coconut milk with 1/4 tsp turmeric, salt and 1 green chilly. Stir in between to check whether it sticks to the pan (add water if need be). Once done, turn off heat.

In another pan, heat oil and stir in chopped onion. When translucent add ginger. Stir for a minute and add curry leaves, 1/2 tsp turmeric and chilly powder. Add 1/4 cup water and cocum pieces / tamarind. Let it boil for 5 -7 minutes. Turn to low heat and add the cooked colocasia and stir well. Check seasoning and let it boil for 5 minutes in low heat. Add the thick coconut milk and stir. Turn off heat when the curry starts to boil. Serve with rice and some veggies.


Spicy Brinjal and Potato Stir Fry

Brinjal is one of my favourite vegetables. Growing up in the hillstation Valparai we had our own patch of vegetable garden and we use...